How to Build a Circle in Minecraft (Step by Step)
Minecraft has no round blocks, so every circle is a pattern of steps. Once you know the pattern, a circle of any size takes minutes to lay out. This guide walks through the method builders use, with a 21-block circle as the example.
Short on time? Open the Minecraft circle generator, enter your size and follow the chart. The steps below explain what the chart means and how to build from it in survival.
What you need
- A flat area a little wider than your circle.
- A cheap marker block such as dirt or wool for the first layout.
- Your coordinates on screen: press F3 in Java Edition, or turn on Show Coordinates in the world settings in Bedrock Edition.
Step 1: choose the diameter
The diameter is the width of the circle in blocks. Pick an odd number if a door, path or tower must sit exactly in the middle, because odd circles have a single center block. Even circles have a 2 by 2 center instead. For a first build, 21 blocks is a good size: big enough to look round, small enough to finish quickly.
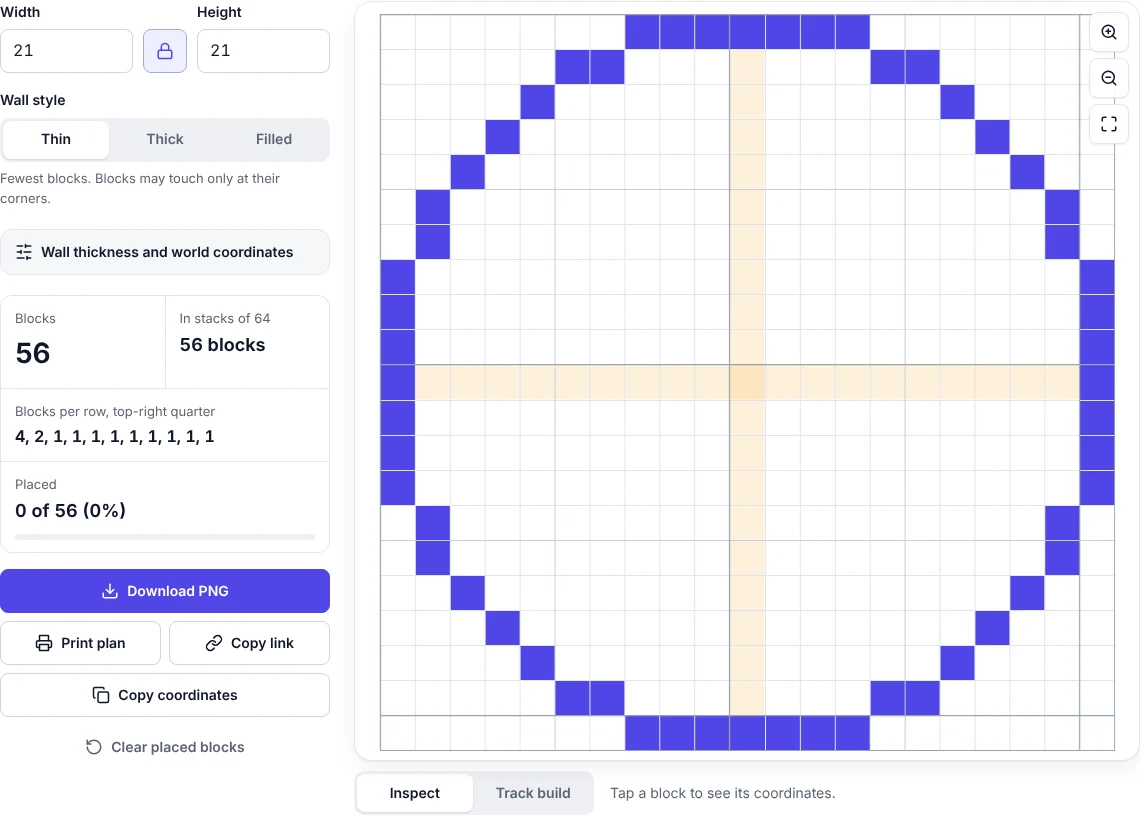
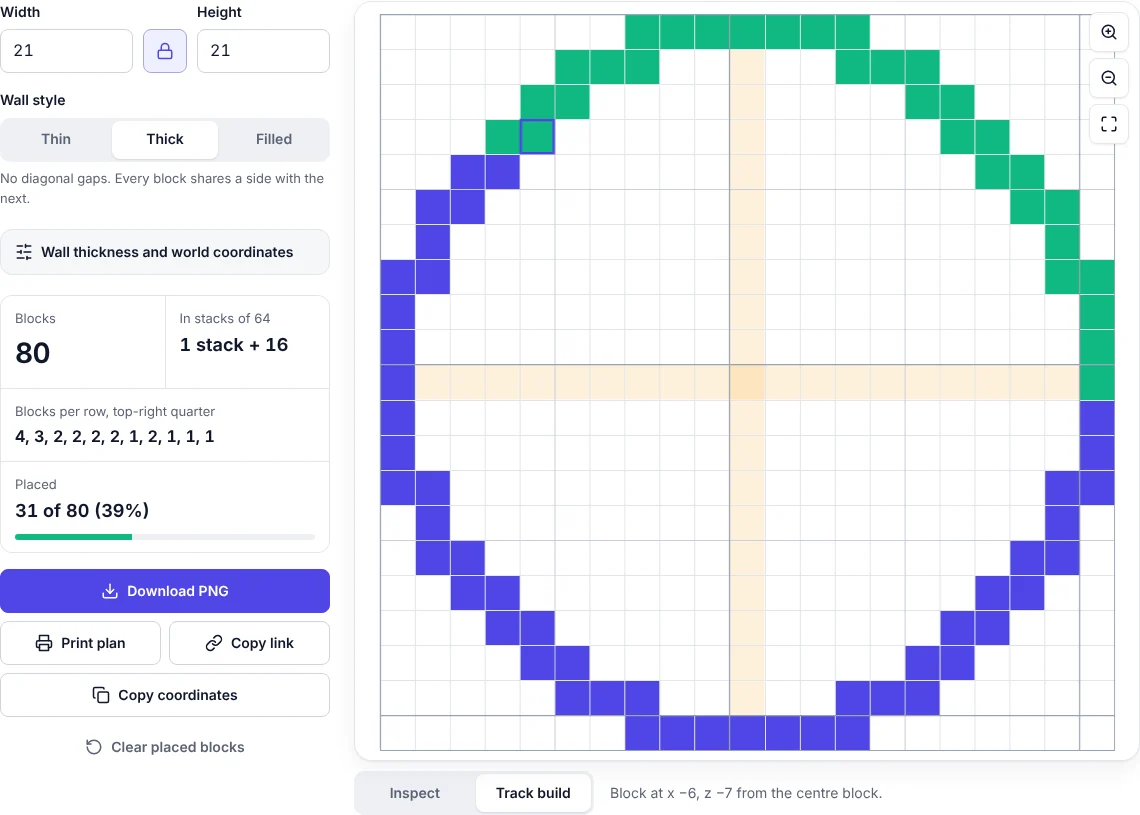
Next, decide on the wall style. A thin circle uses the fewest blocks but has corner-only joins on the diagonals. A thick circle fills those corners so nothing can slip through. Use thick for walls and anything holding water.
Step 2: mark the center
Stand where the middle of your circle should be and place a marker block. Look at your coordinates and write down its X and Z. Every other block is measured from this one. If you enter X and Z in the generator under world coordinates, tapping any block shows its exact position in your world.
Step 3: place the four tips
From the center block, walk straight north, south, east and west. For a 21-block circle the tips are 10 blocks from the center in each direction. Place a marker at each one. These four points sit on the straight top, bottom and sides of the circle, so they are easy to get right and they let you check your work later.
Step 4: follow the quarter pattern
A circle is the same shape in all four quarters, so you only need the pattern for one. The generator lists it as blocks per row, top-right quarter. For the 21-block thin circle it reads:
4, 2, 1, 1, 1, 1, 1, 1, 1, 1, 1
Start at the top row, beginning with the block on the center line, and place that many blocks going right. Drop down one row and place the next number, starting where the previous run ended. Keep going until the runs become single blocks that climb straight down to the middle row. On a thin circle the numbers only shrink or stay the same as you go down, which is what makes the curve. Thick circles add extra corner blocks, so their rows can go up by one now and then.
Step 5: mirror it to the other quarters
Repeat the same runs in the other three quarters, mirrored. Many builders find it easiest to build the top half first, then copy it downward row by row. When you reach each tip from Step 3, your run should land exactly on it. If it does not, recount the last few rows before going on.
Step 6: check, then swap in your real blocks
Fly up or climb a tower and look down. A good circle looks smooth from above, with no flat spots that are longer than their neighbours. When you are happy, replace the marker blocks with your final material. For walls, build the ring upward as many layers as you need; every layer is the same circle.
How many blocks will I need?
A thin 21-block circle needs 56 blocks for one layer. Multiply by the wall height for a tower or wall. The generator shows the count for any size and style, including how many stacks of 64 that is, and the circle generator page has a table of common sizes.
Common mistakes
- Counting the center twice. On odd circles the center row belongs to both the top and bottom half. Build it once.
- Mixing odd and even. If your tips are not the same distance from the center in every direction, you have measured one side as even and the other as odd.
- Losing your place on big circles. Use the printable plan, which has bold lines every 10 blocks, or the build tracker.
- Leaks in water features. Thin circles have corner-only joins. Use the thick style for ponds and moats.
Ovals work the same way
An oval just has a different width and height, so its four quarters are still mirror images. Unlink width and height in the generator, enter both, and follow the same steps. The tips will be different distances from the center on the long and short sides.
Ready to build? Open the Minecraft circle generator.
Last updated: November 9, 2026